VMware HCX Network Extension High Availability (HCX-NE-HA) is a feature released since HCX 4.3. However, you can only enable it if you have a HCX Enterprise license.
HCX-NE high availability is achieved by deploying a second HCX-NE appliance (standby) at each site paired with an active one. The four HCX-NE appliances (1 active & 1 standby per site) then form a HA Group.
This is just one of the many options HCX offers to improve the availability of your hybrid cloud extension environment.
Check out the excellent VMware HCX Availability Guide to see all the options available.
I strongly recommend that you implement HCX-NE-HA in your production environment in conjunction with Application Path Resiliency or Multi Uplinks Service Mesh resiliency for 2 reasons:
- Unplanned outage leading to the loss/unavailability of your HCX-NE appliance(s)
- Upgrade of your HCX environment
You should plan ahead for HCX-NE-HA deployment as you will require more resources (additional IP address and CPU/Memory/Storage for each HCX-NE standby appliance).
Also, be aware that if you want to enable this feature on an existing HCX Service Mesh with HCX-NE appliance(s) already running, you will cause traffic disruption on your existing HCX L2 extended network(s) as you cannot enable HA if you have existing network extensions.
You will need to unextend your current L2 extended networks first, which means any VMs using them will lose network connectivity.
Activate HCX-NE-HA
In my case, I enabled it on an existing HCX Service Mesh running on Azure VMware Solution (AVS).
In the rest of this article, I will go through the different steps to activate HA on your HCX NE appliance.
As you can see on the screenshot below, I only run 1 HCX-NE instance with Application Path Resiliency.
The first step is to select your HCX-NE appliance under the Appliances tab of your Service Mesh dashboard. (All my existing extended networks were deleted before I started)
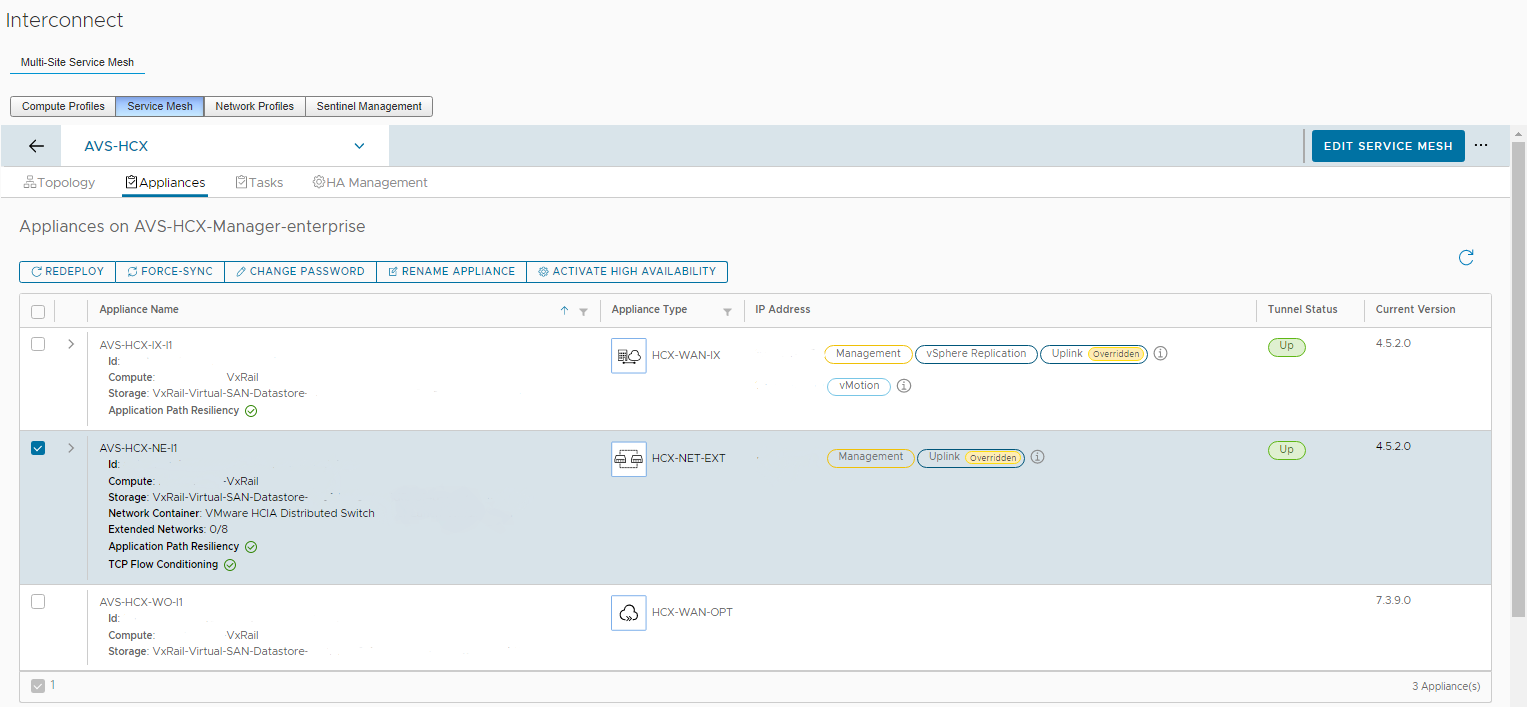
After clicking on Activate High Availability, you should see the following error message if your Service Mesh Appliance Count is not large enough to deploy additional appliances:
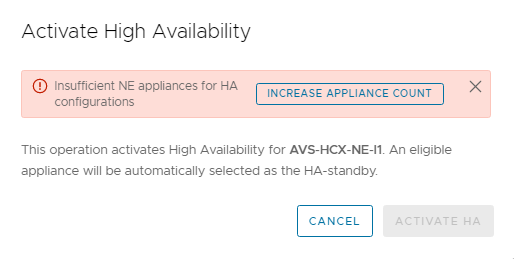
Next, you need to edit your Service Mesh to increase the Appliance Count number so that you can scale out your Network Extension Appliances. (Appliance Count number is also increased automatically at the remote site during the operation)
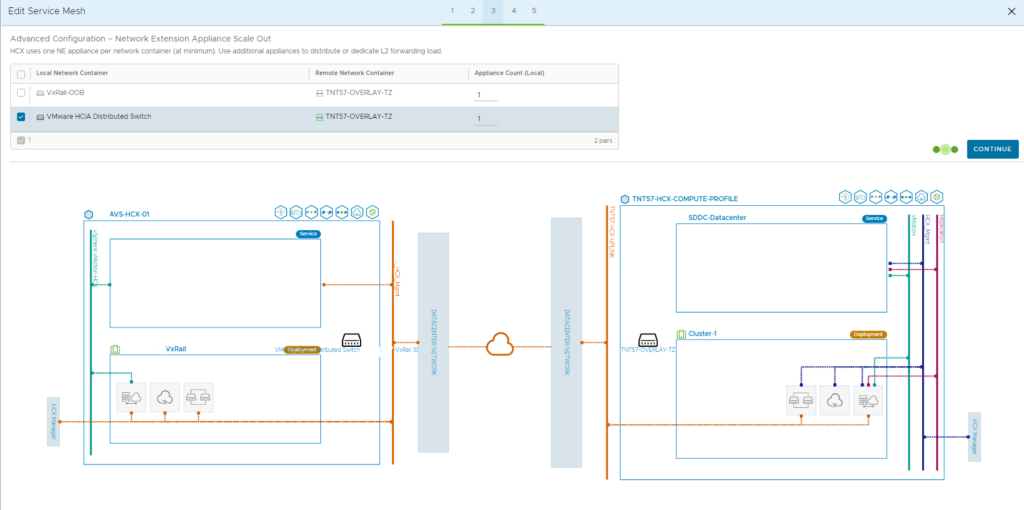
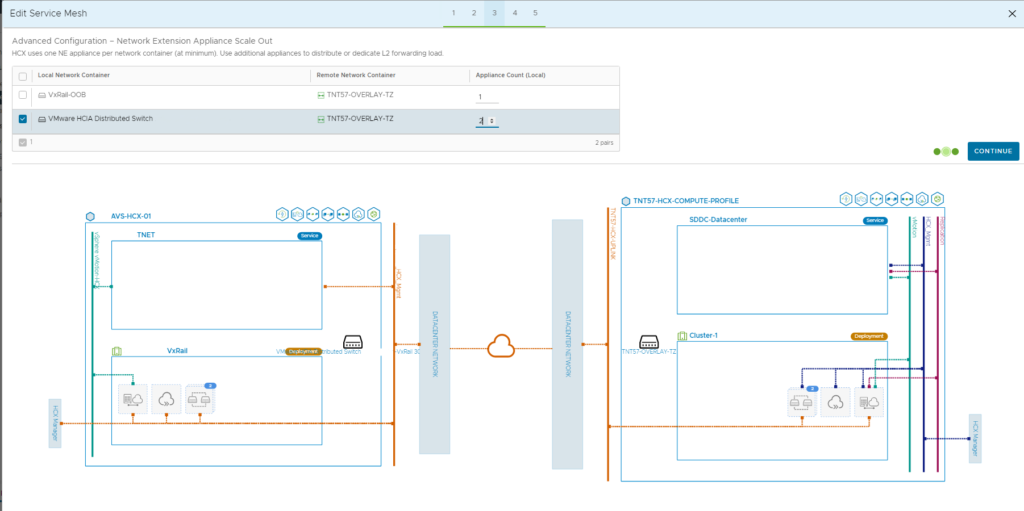
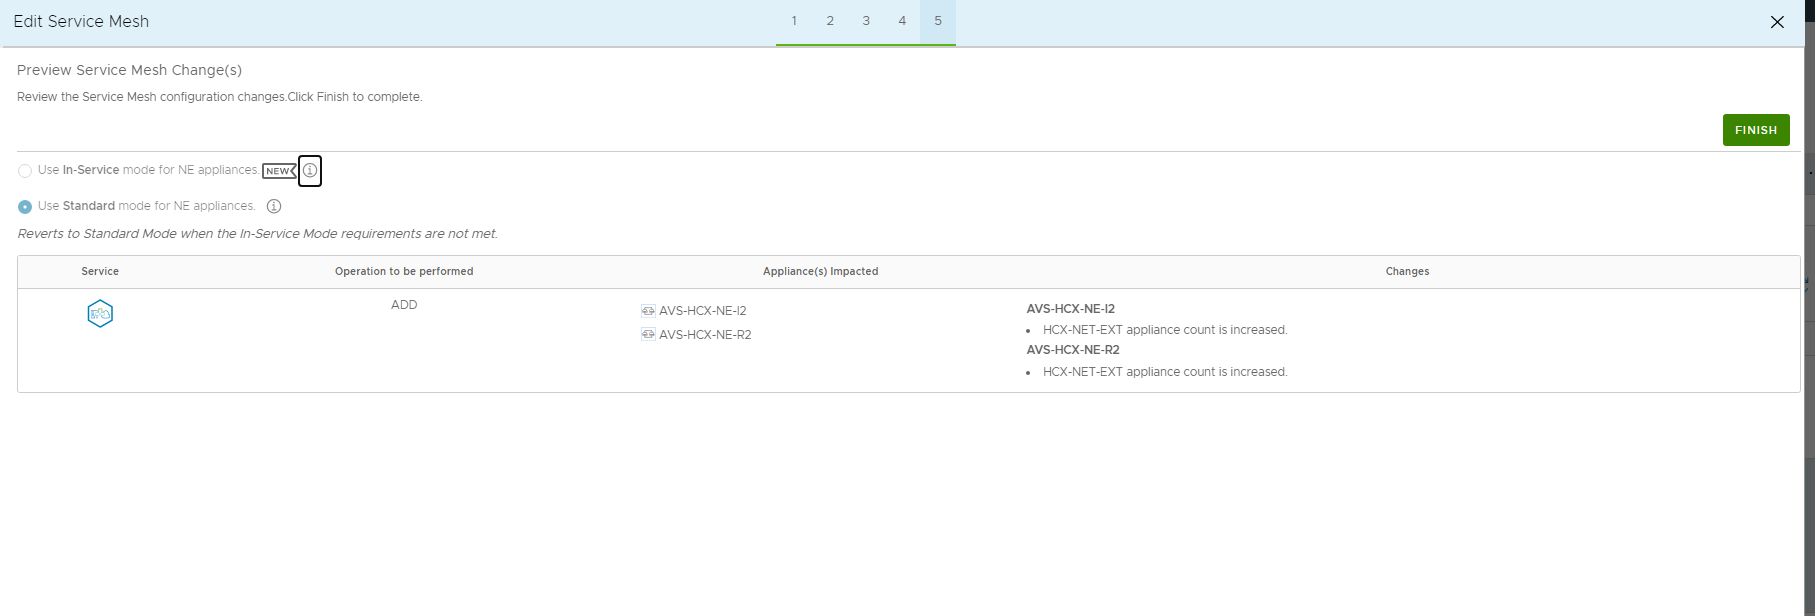
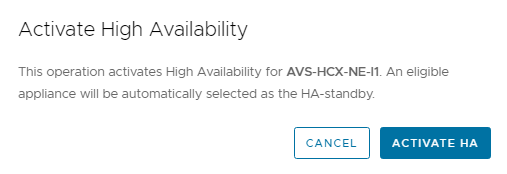
Once the Service Mesh reconfiguration completed, re-select again your HCX-NE appliance and click on Activate High Availability. Then, with the following window appearing on the screen, click on Activate HA
From your Service Mesh, under the Tasks tab, you can see the progress of the HA configuration status:

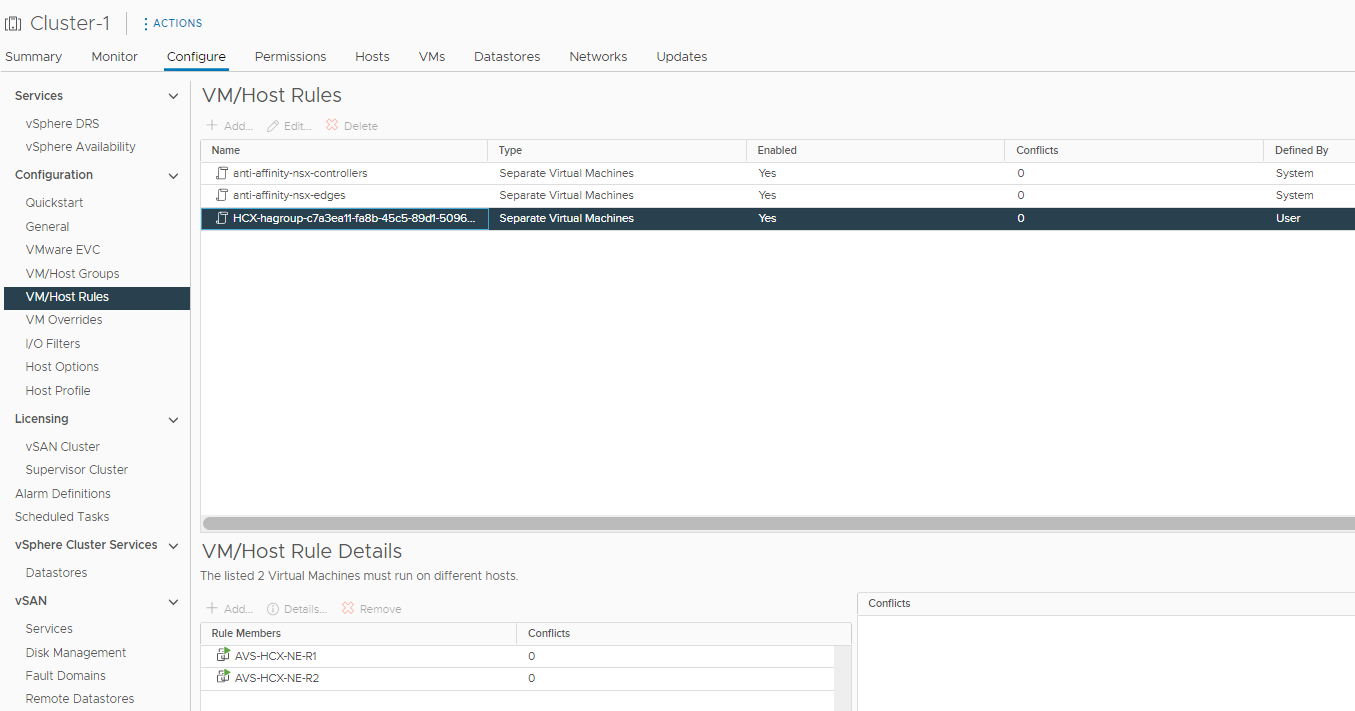
Additionally, it automatically creates a new DRS anti-affinity rule to separate your active and standby HCX-NEs at the ESXi cluster level:
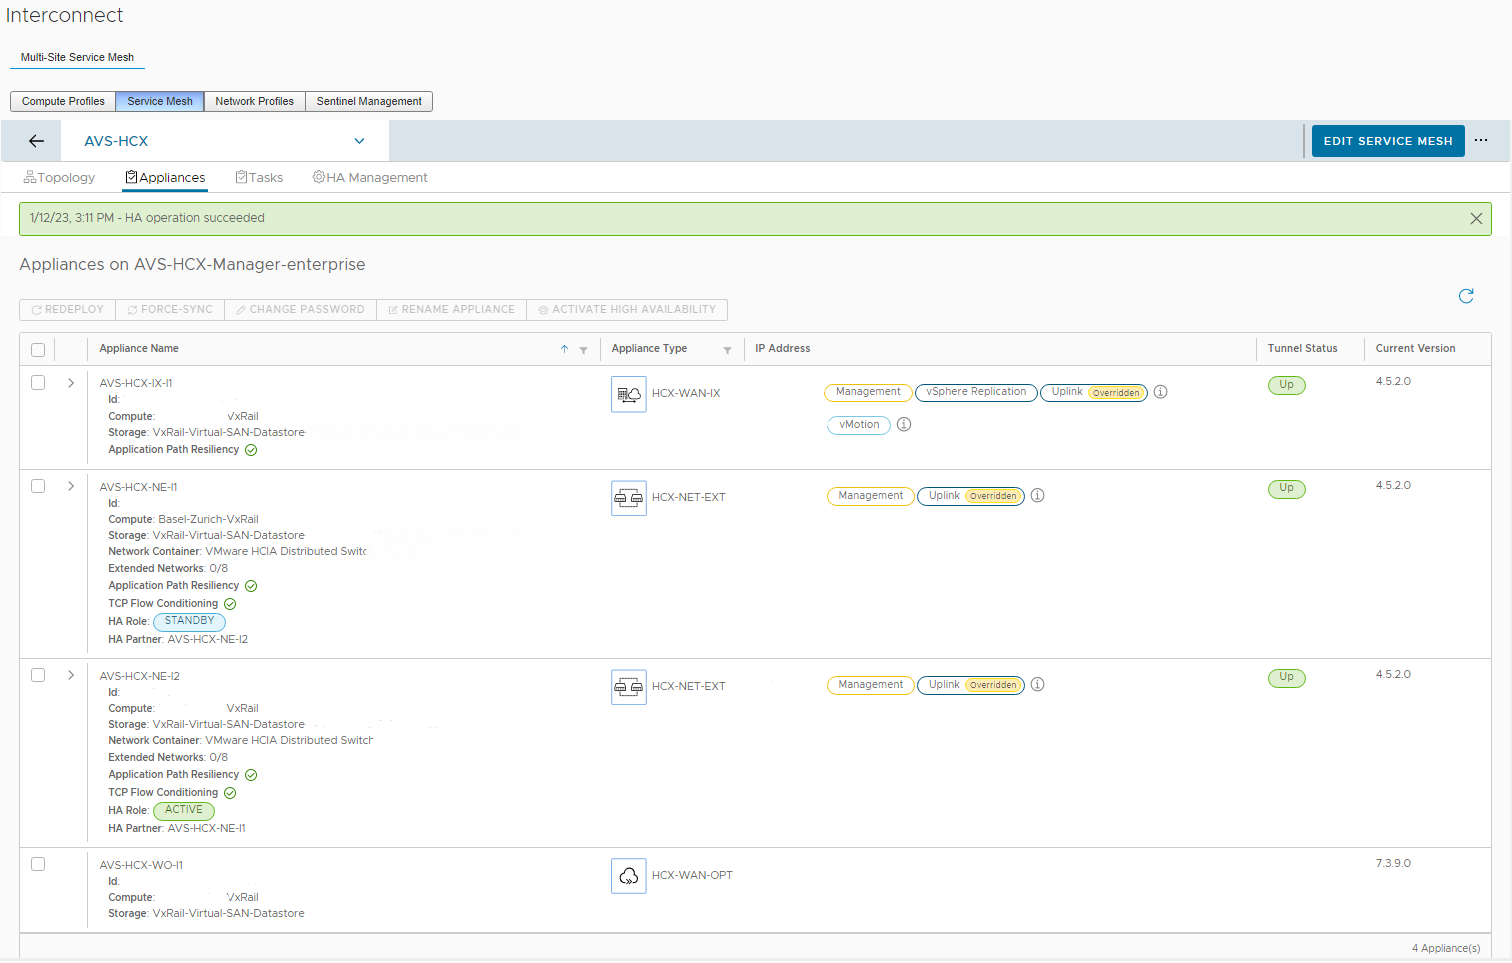
Afterwards, you see the message “HA operation succeeded” and additional detailed information regarding the appliance’s HA role:
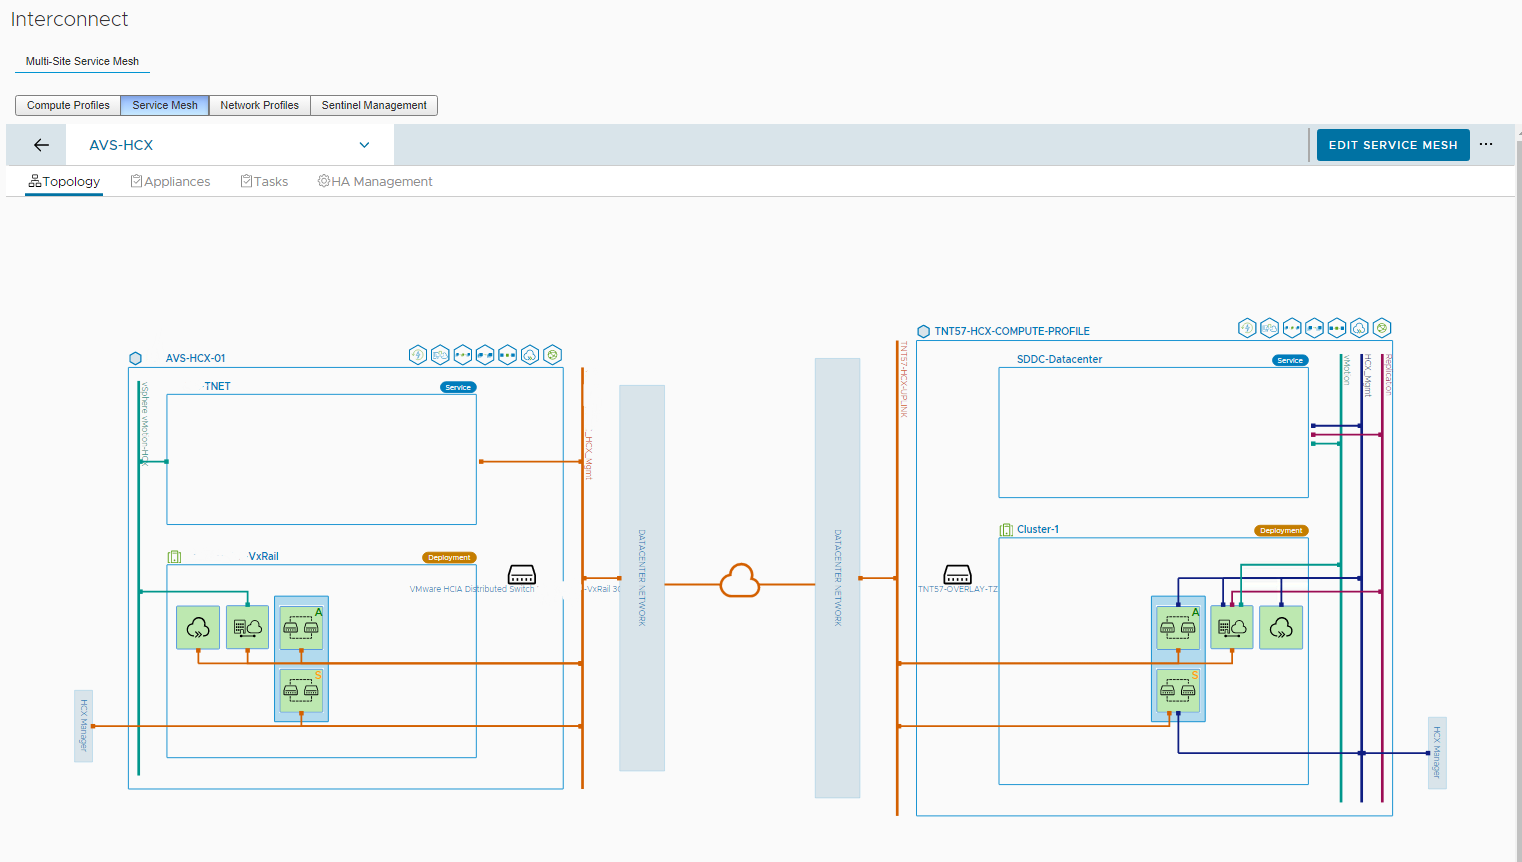
If you check your Service Mesh topology, you should see the 2 HCX-NE appliances marked with A (active) and S (standby)
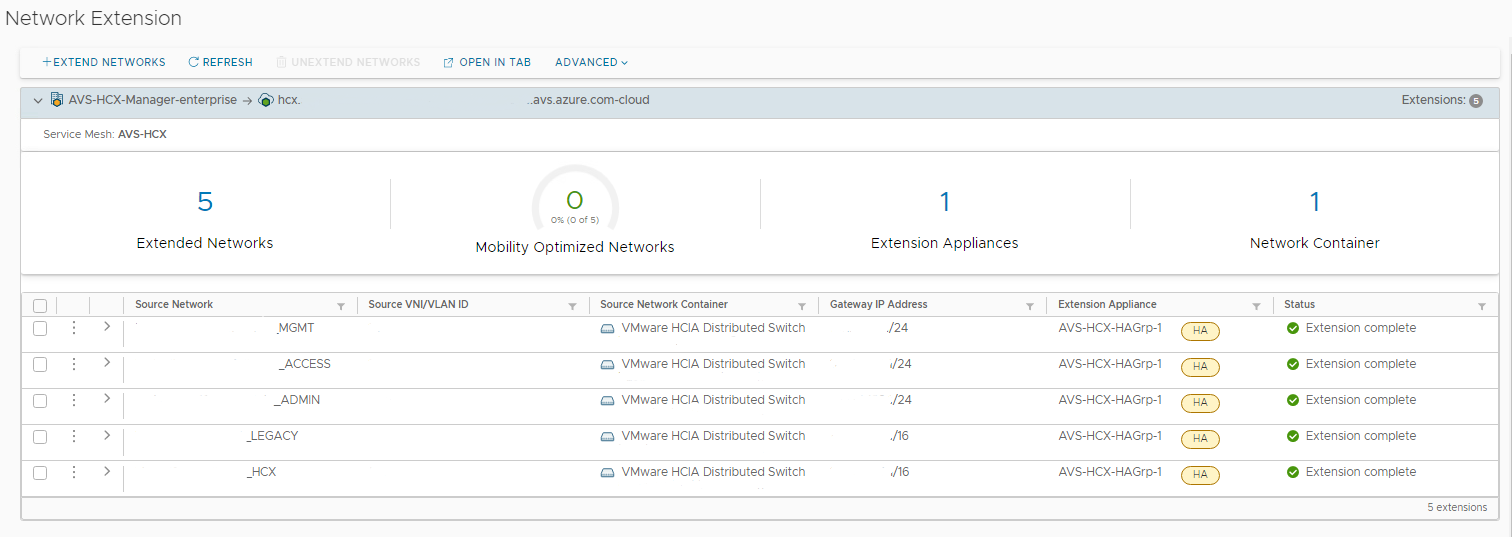
The last step is to extend your networks. You may notice the addition of the HA tag in the Extension Appliance view:
HA Management
By clicking on HA Management tab in your Service Mesh dashboard, you can see more details about your HCX-NE HA groups.
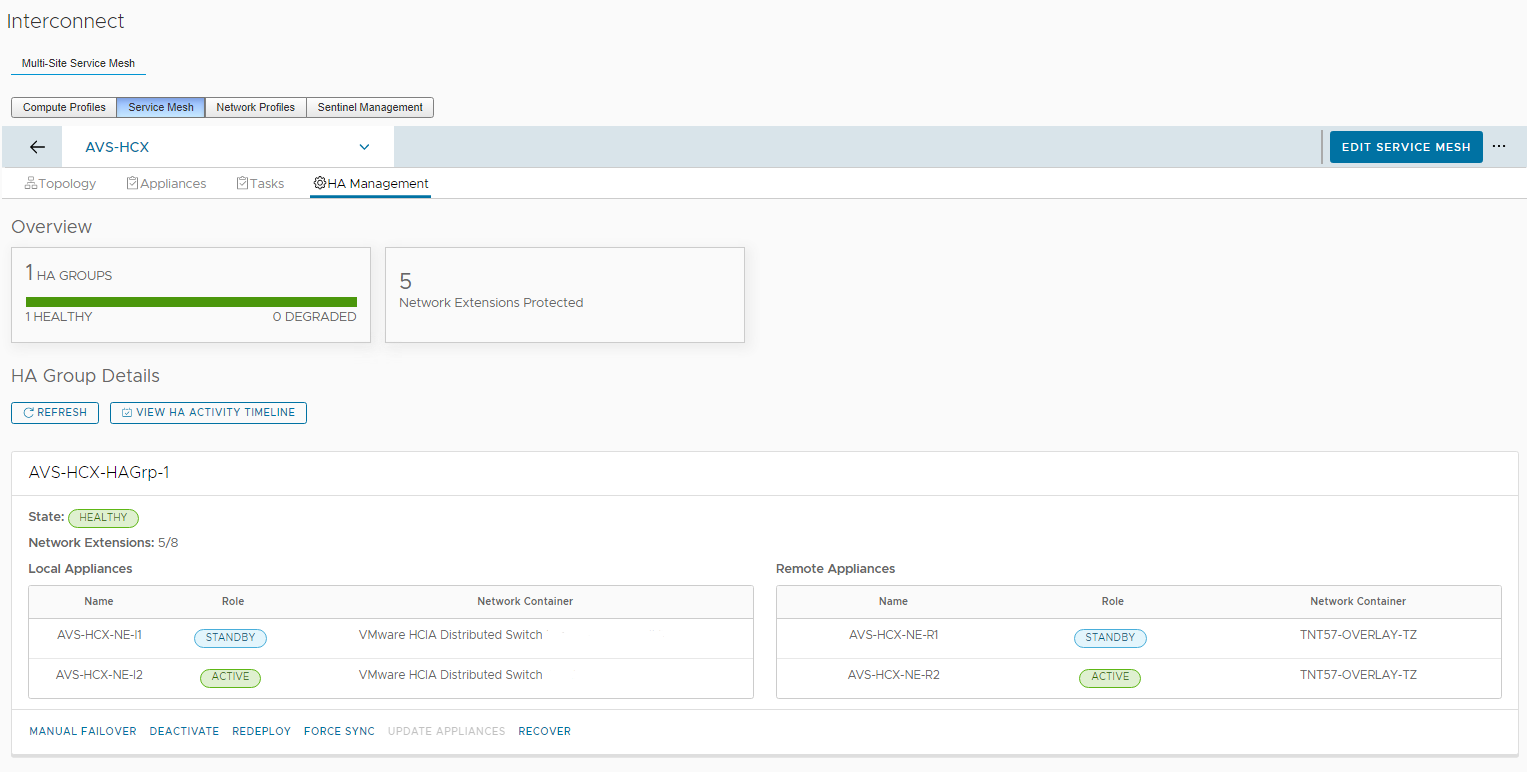
In top of viewing the health status your HA groups, the number of HCX-NE appliances deployed and the number of network extensions in use, you can also perform several actions:
- Manual failover to your standby HCX-NE appliance
- Disable the HCX HA Group
- Redeploy HCX HA Group appliances (also on the remote site)
- Force sync between HCX-NE appliances
- Update appliances (when updates are available)
- Recover a HA group to a healthy state
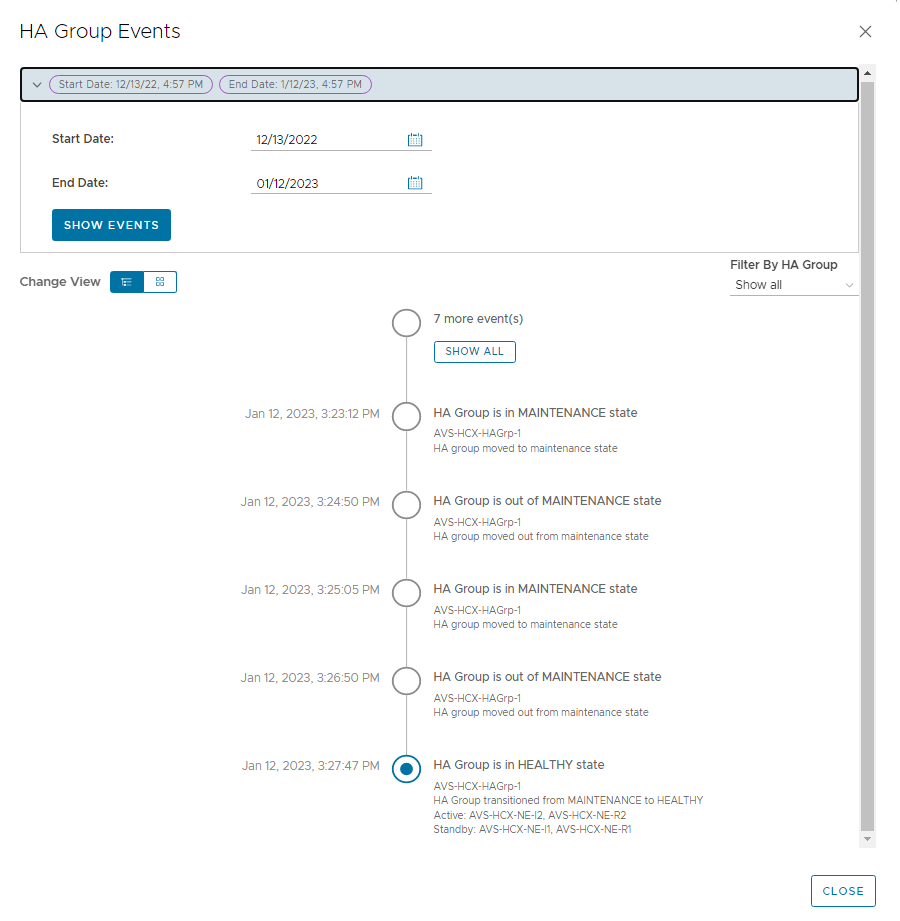
As well more details regarding your HA activity timeline and events:
If you want to dive deeper into VMware HCX Network Extension High Availability (HCX-NE-HA), I suggest you read the dedicated section from the VMware HCX 4.5 User Guide
