AVS (Azure VMware Solution) backup with Dell DDVE Cloud Tier gives you the option to backup your virtual machines to an Azure Blob cloud storage destination.
You can deploy Dell DDVE (Data Domain Virtual Edition) in 2 ways:
- Deploy DDVE VMware ova in your AVS cluster
- Deploy Dell PowerProtect DDVE directly from Azure Cloud marketplace
(Dell PowerProtect DDVE includes the backup & management software whereas DDVE alone must be integrated with third-party backup software)
Note that a 60-day evaluation license is included with Dell DDVE, which is more than enough for testing.
Dell DDVE is also available from other cloud providers: AWS, Google Cloud, Alibaba Cloud… You can have an homogenous VM backup solution on the different public cloud and on-premise. Another major benefit is leveraging in-house skills & knowledge if you already use Data Domain as your enterprise’s backup solution.
In the rest of this article, I will go through the required steps to deploy Dell DDVE ova directly on your Azure VMware Solution cluster.
Note that in my case, DDVE is used with an existing on-prem Dell Networker instance to backup my AVS virtual machines. The integration of the two products with each other is not covered in this article.
DDVE OVA Deployment
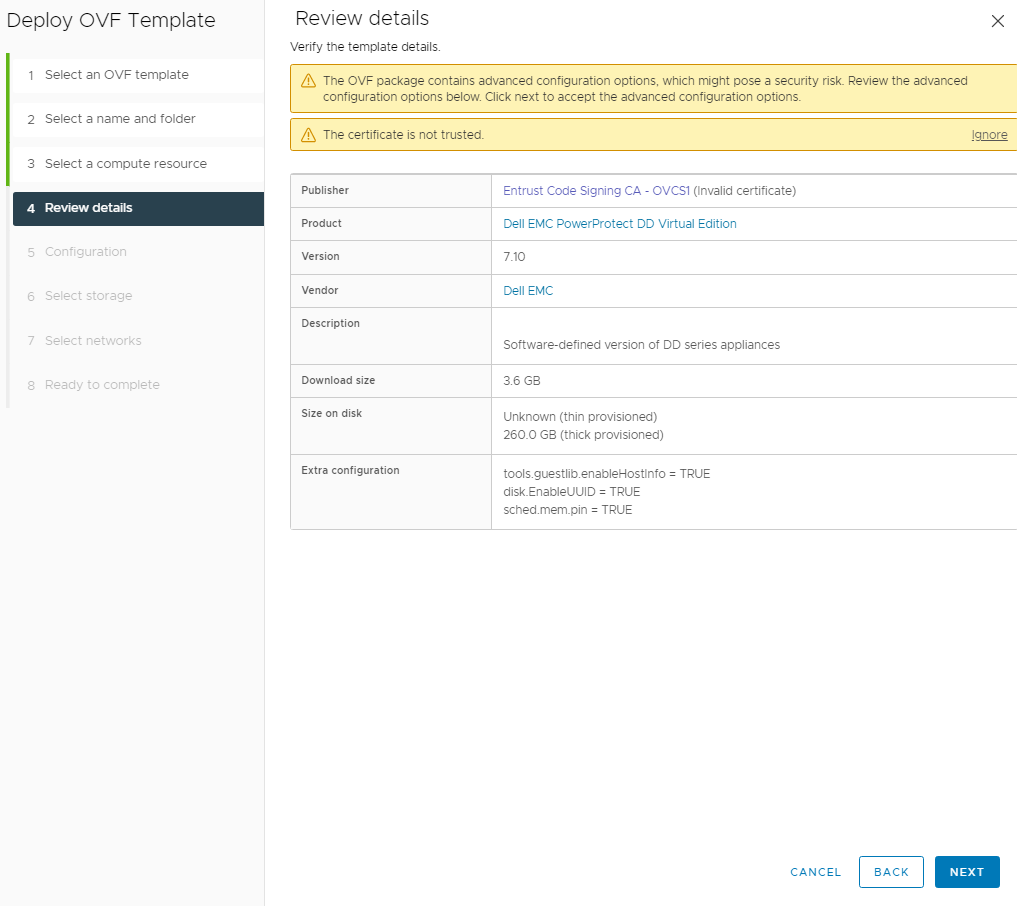
Firstly, you have to download the latest version of DDVE virtual appliance from Dell Support website then you can deploy it as an OVF template in your AVS cluster:
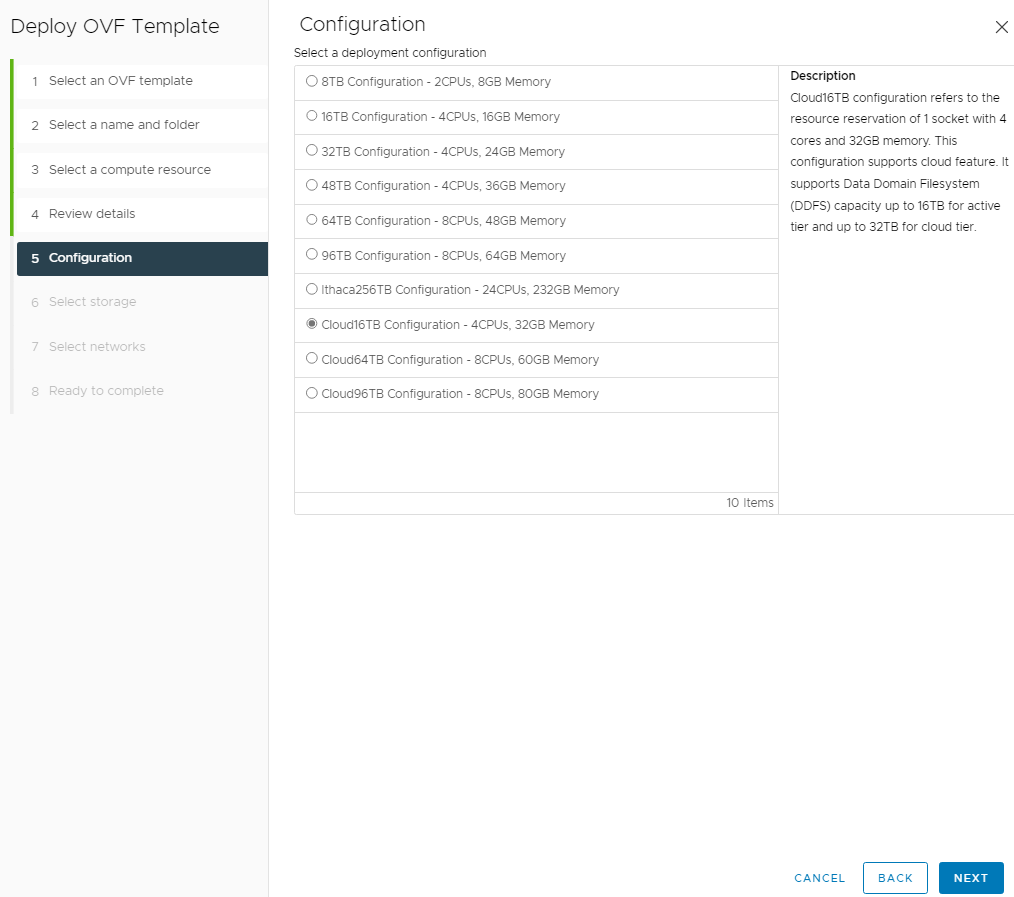
From the Configuration setting, you must select one of the Cloud deployment configuration available. It is mandatory to support the cloud tier feature:
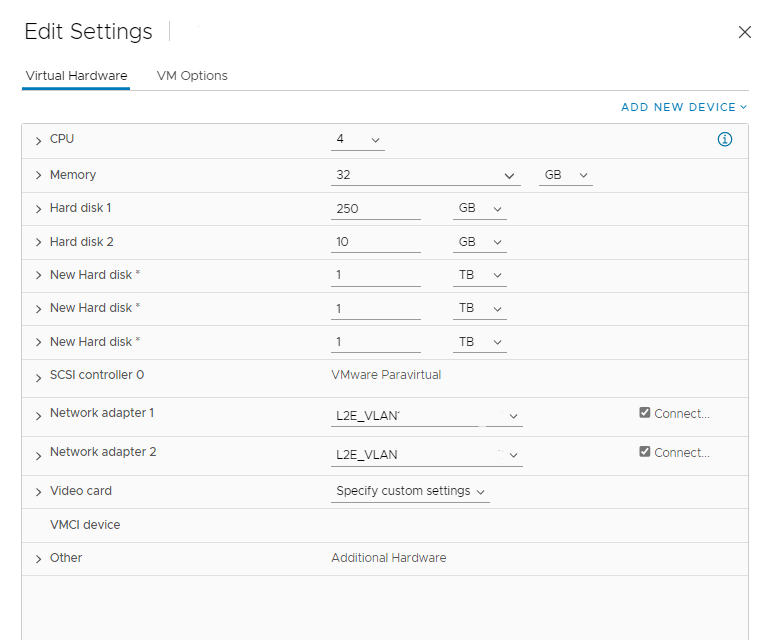
Once the DDVE appliance deployed, you need to add additional virtual disks to create the different file systems. It requires at minimum 2 new vmdks of 1 TB each for:
- Active Tier file system
- Cloud Tier file system
Due to license capacity, activating DDVE Cloud Tier requires a minimum file system size of 465.66 GB (hence the choice of 1TB virtual disk size).
DD File System configuration
When first connecting to the DD System Manager, you will notice that there is no existing file system:
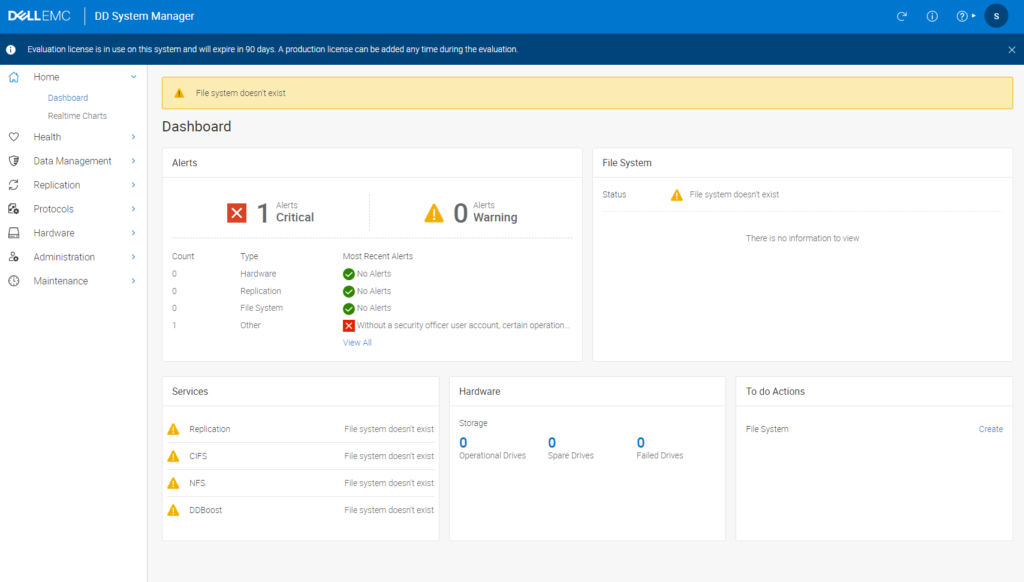
Then, under the Data Management section from the DD System Manager dashboard, you must need to create new file systems:
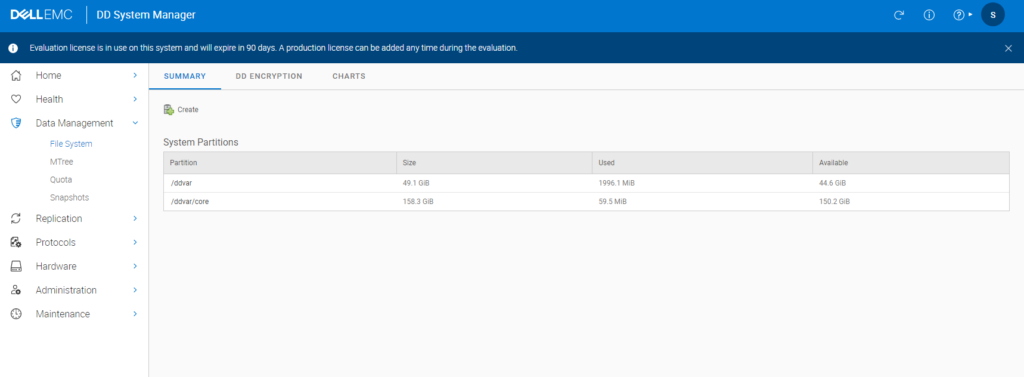
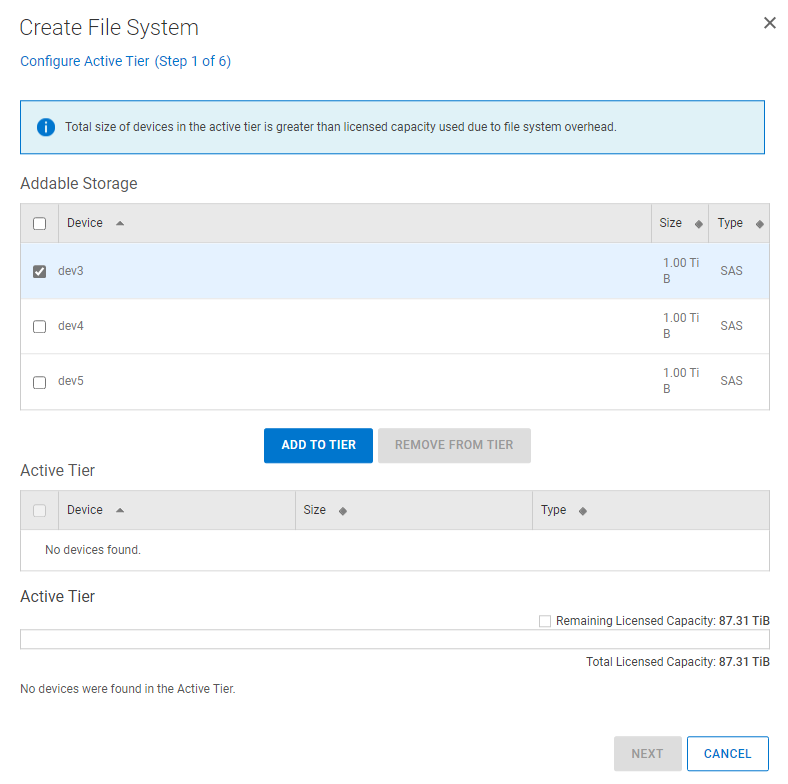
The first file system is for the Active Tier. Select one of your 1TB vmdk from the Addable Storage and click on Add to tier button:
The device is now visible under the Active Tier section. Click Next to continue.
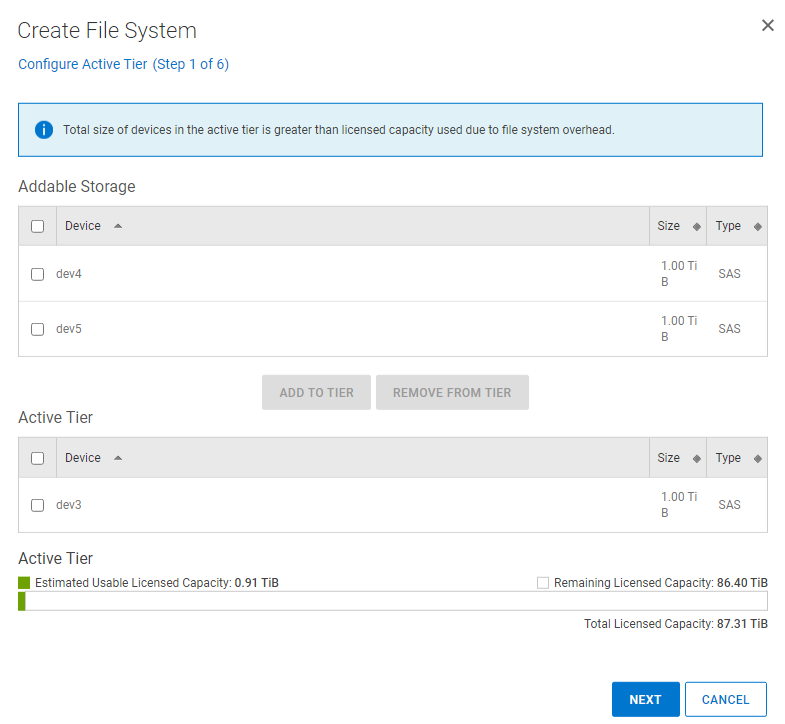
In the same vein, select a second vmdk from the Addable Storage to be consumed by the Cloud Tier then click on Add to tier.
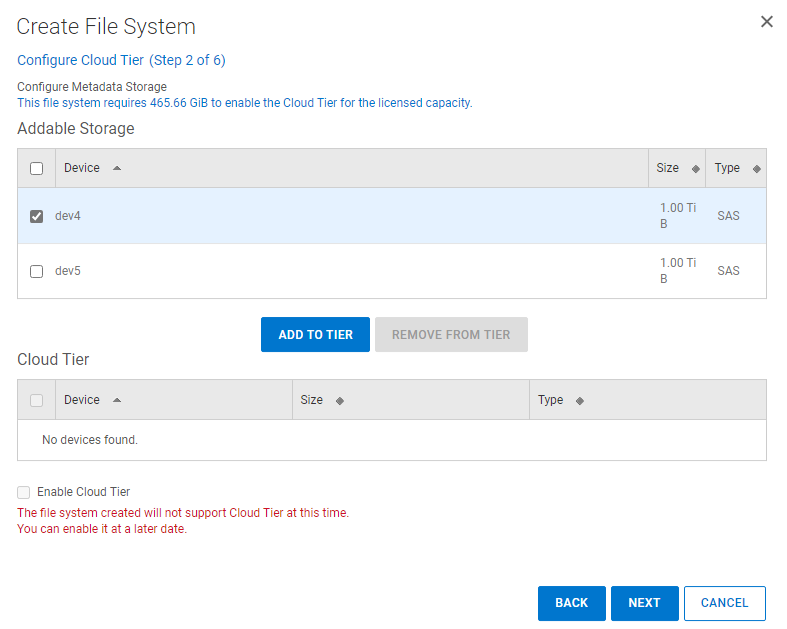
Afterwards, tick the box Enable Cloud Tier and type a passphrase that will be used to encrypt the cloud access and secret key:
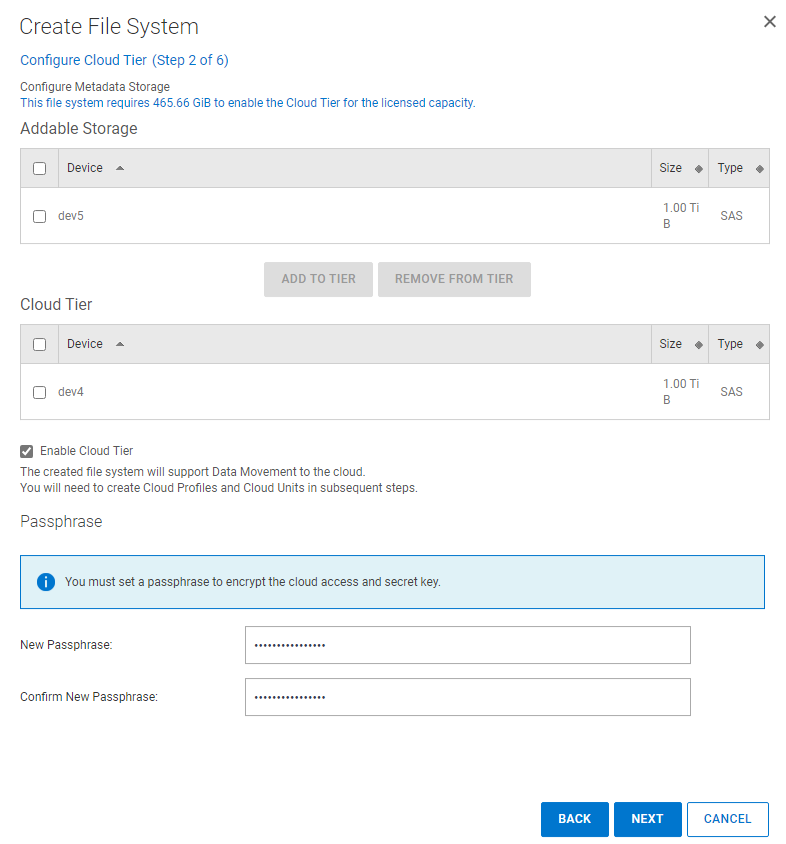
You can skip the Cache tier configuration and leave empty then click on Next:
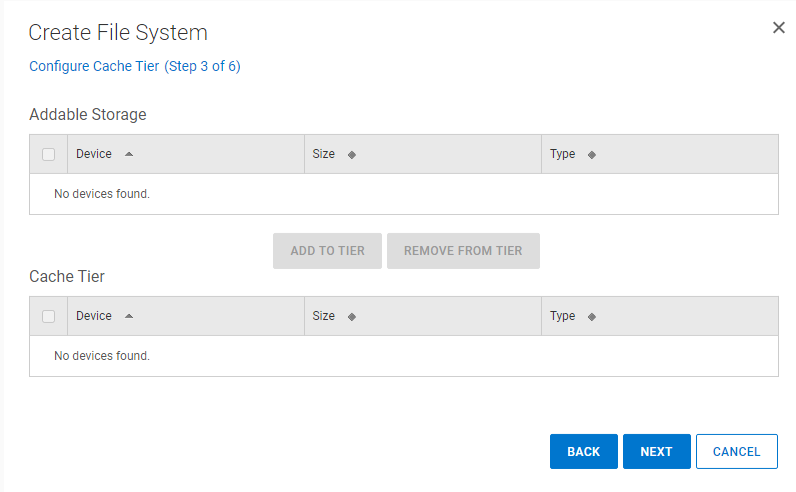
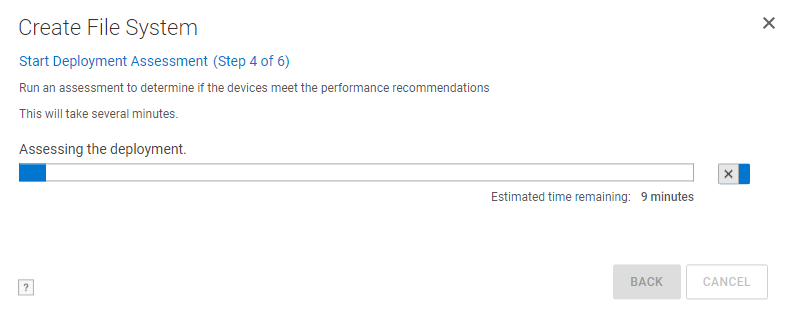
In the next window, you need to select one of the deployment assessment based on your backup preferences: whether you want to only use DD Boost for backup or use CIFS/NFS
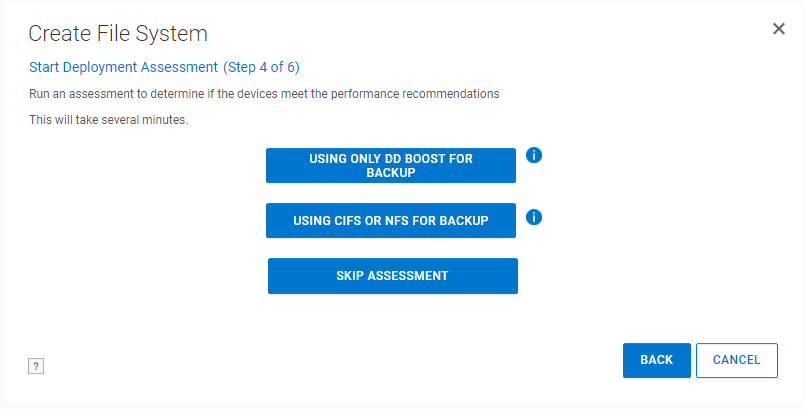
This assessment will determine if your DD devices meet the performance recommendations
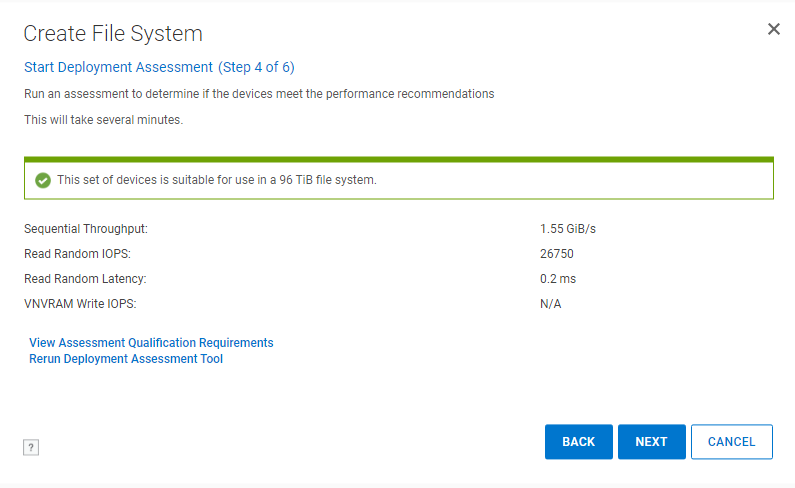
Once completed, you should see the DD devices assessment result with some throughput/IOPS/latency performances values. Click Next to continue
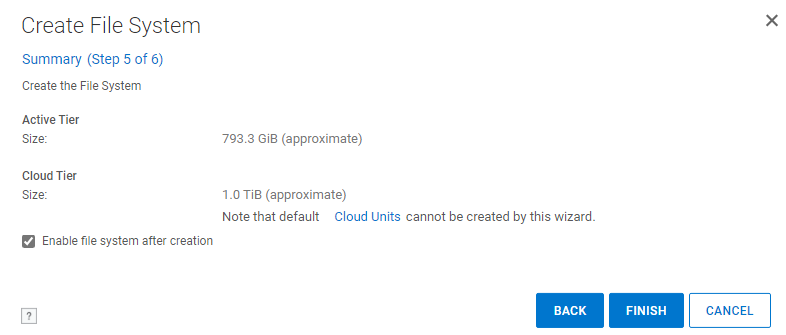
Finally, you see a summary of the 2 DD files systems (Active Tier & Cloud Tier). Don’t forget to tick the box Enable file system after creation. Click on Finish to start proceed with the file systems creation.
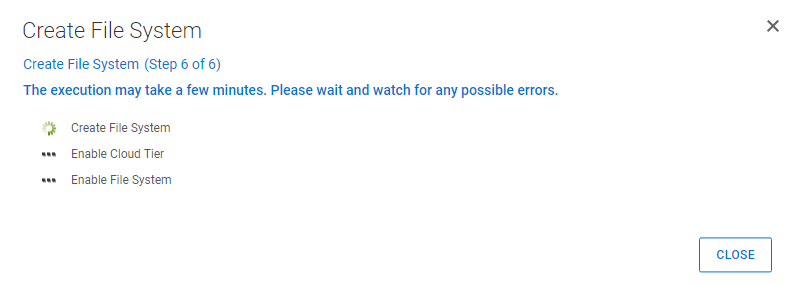
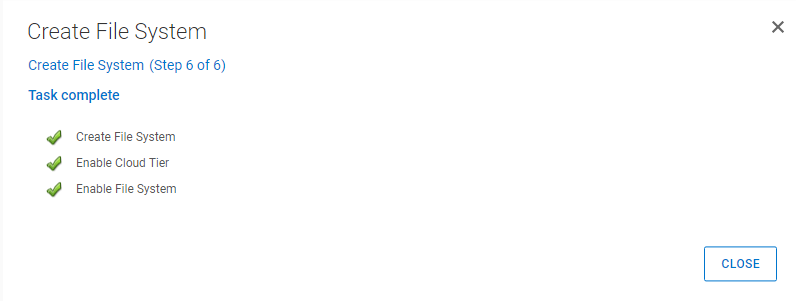
All the file system creation tasks should complete successfully:
DD Cloud Unit configuration
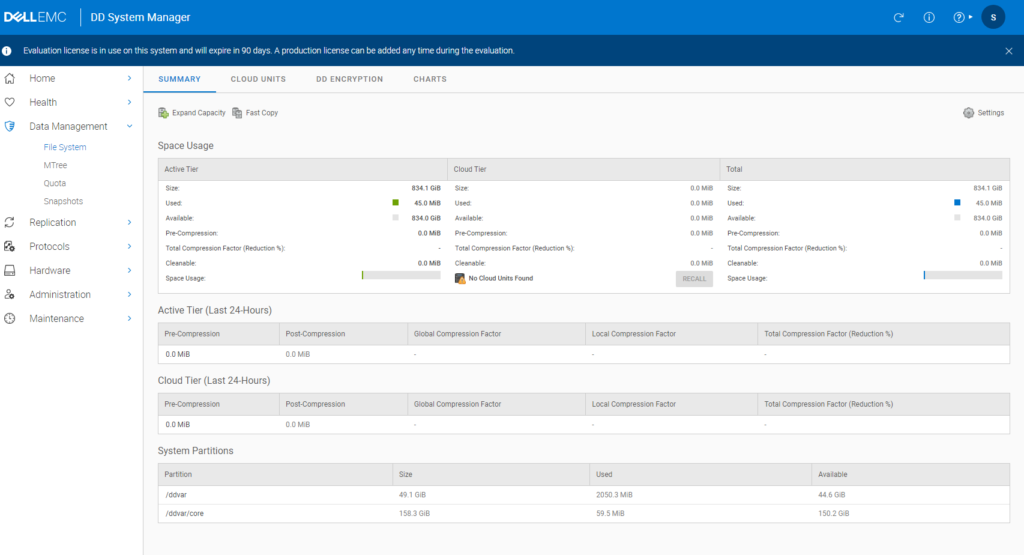
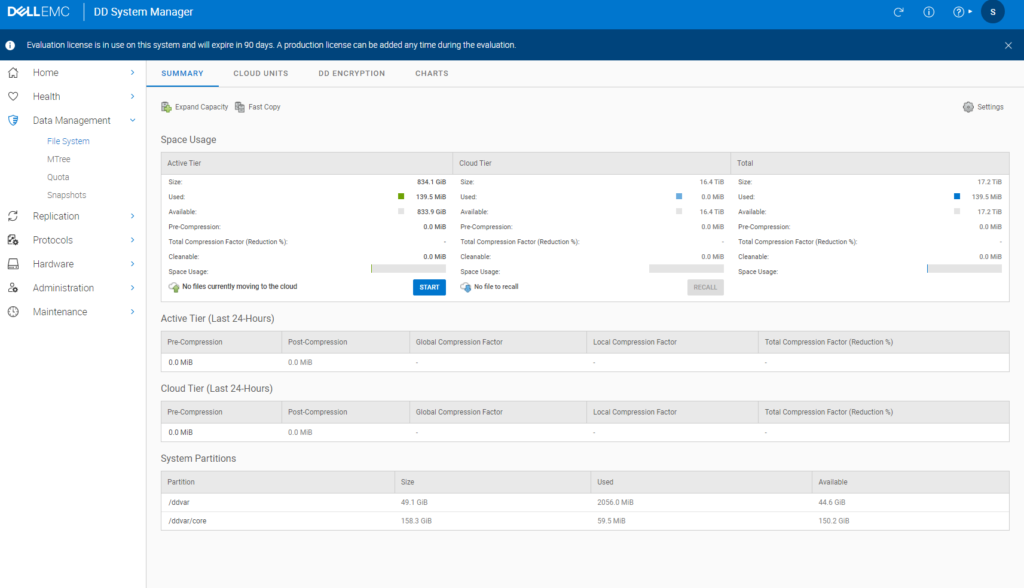
After creating your file systems, you can see the “No Cloud Units Found” notification in the Summary tab. You may also notice that all Cloud Tier space usage values are set to 0.
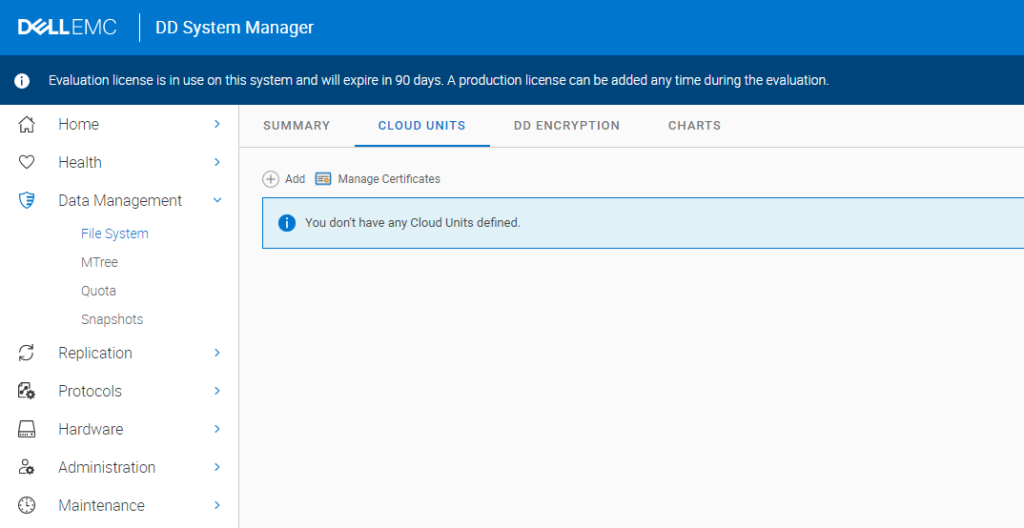
If you click on Cloud Units tab, you will see that no Cloud Units have been defined yet.
Also, a few important things to note about the Cloud Units:
- Data Domain only supports a maximum of 2 Cloud Units
- Your Azure Blob Storage container must be empty
- By default, you cannot configure an Azure private endpoint* (I’ll provide a workaround at the end of the article)
As you will have understood, the next step is to create a DD Cloud Unit. Click to Add to proceed
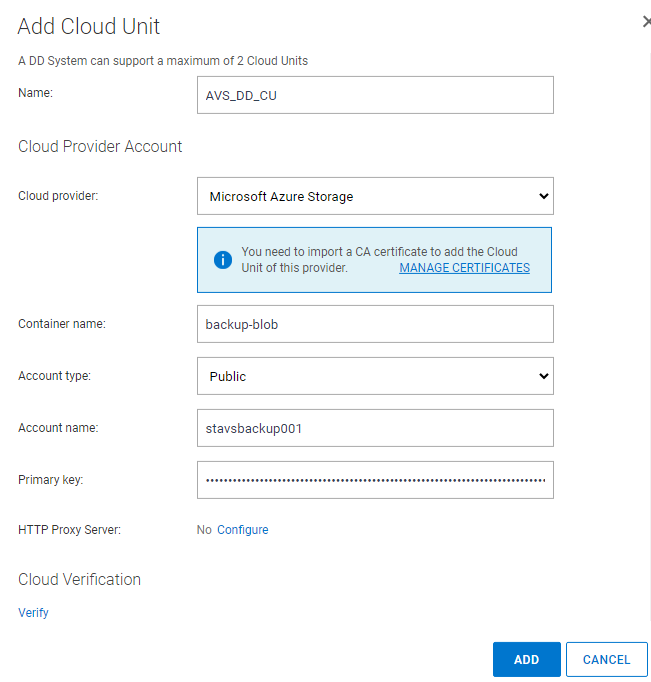
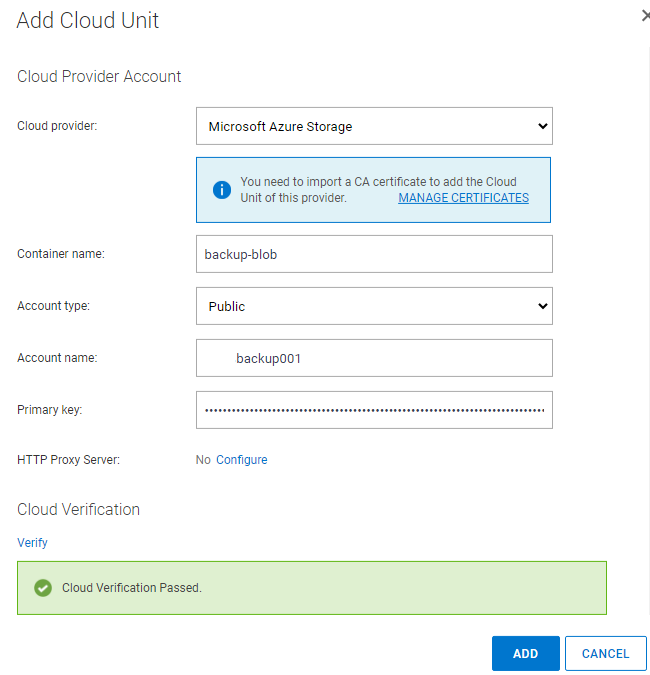
The Cloud Unit wizard creation appears on the screen. You will need to fill in the following fields for the Cloud Provider Account:
- Name of your cloud unit
- Cloud provider
- Container name
- Account type
- Account name
- Primary key
- HTTP Proxy server configuration (if used)
Cloud Provider Account Certificate
Additionally, you must import the CA certificate(s) used by Microsoft Azure Blob by clicking on Manage Certificates:

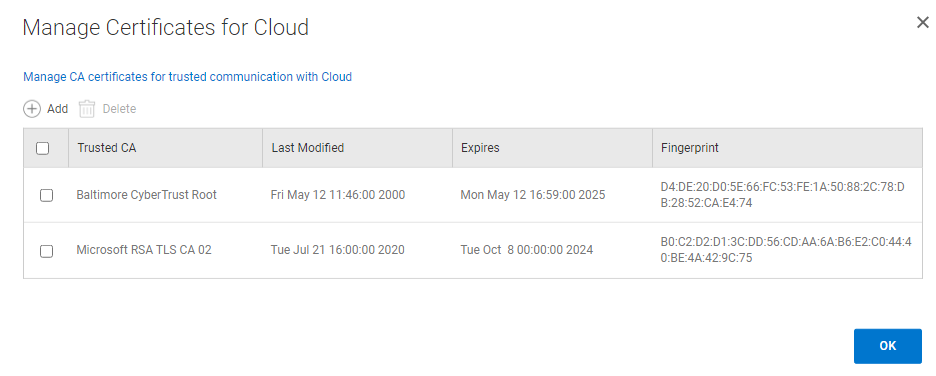
At the time of writing, there is only 2 certificates to import for Azure Blob services:
- Baltimore CyberTrust Root
- Microsoft RSA TLS CA 02
Click on Add to upload your CA certificate for Cloud:
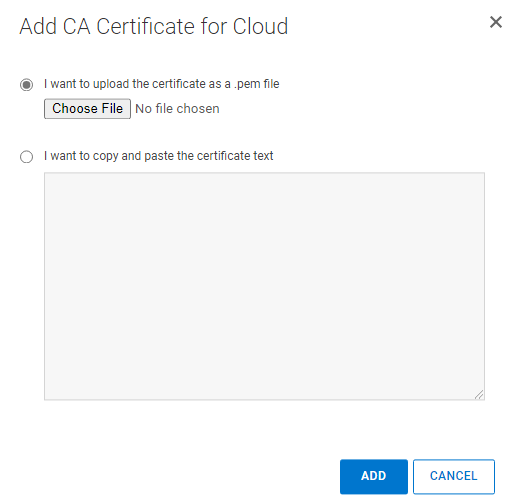
Then, you can either upload the certificate as a .pem file or copy/paste the certificate text:
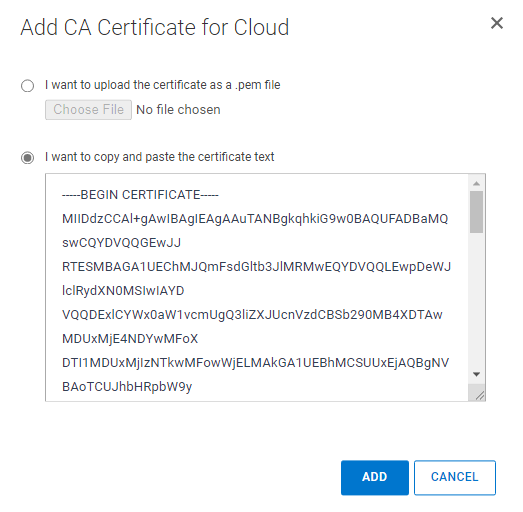
Once selected, click on Add to import the certificate.
Repeat the previous steps for the second certificate.
Once the import completed, you should see the 2 CA certificates as below:
After that, under Cloud Verification, click on Verify:
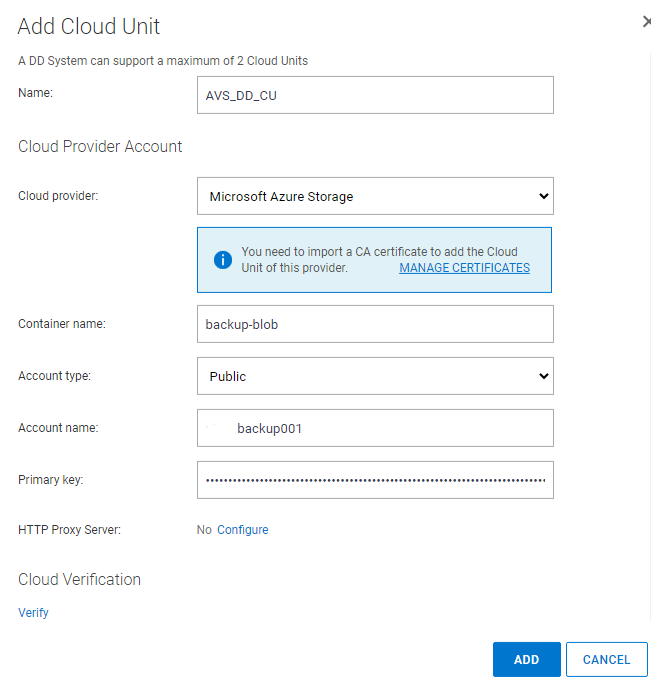
As a result, you should get the message Cloud Verification Passed. Click on Add.
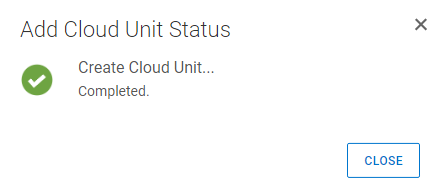
Eventually, you will see a pop up window with the Cloud Unit creation completed:
DD Cloud Unit Administration
If you return to the Summary tab for the File System, you notice that the Cloud Tier space usage changed for 16.4 TB (size configured during the DDVE appliance deployment)
In order to be able to use your Cloud Unit as a backup destination, you will first need to create a data movement policy to move backup files based on their age.
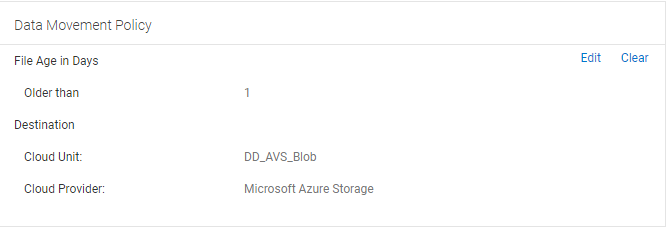
Initiating the data movement of your file to the Cloud Unit can be done in 2 ways:
- Running it manually by clicking on the Start button from the Active Tier Summary
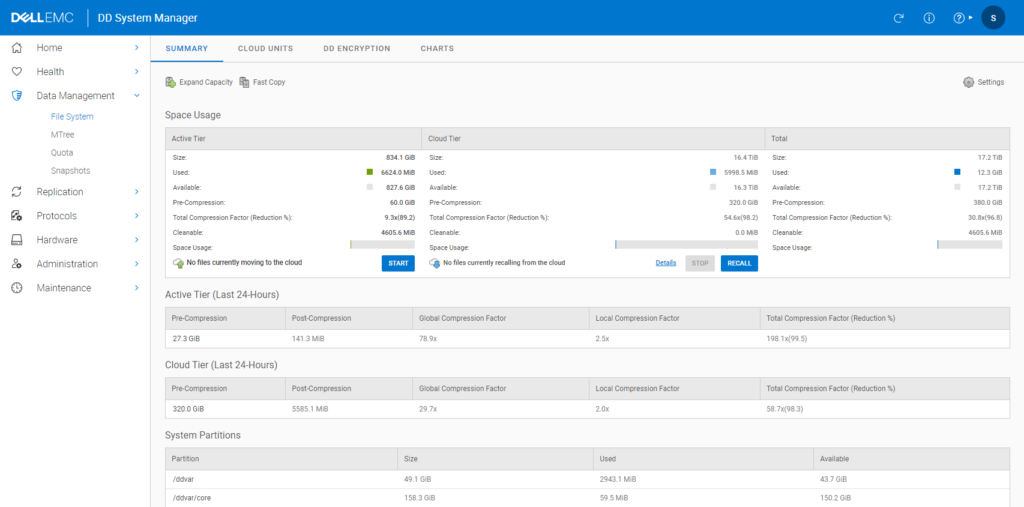
- Scheduling the data movement from your Cloud Unit settings

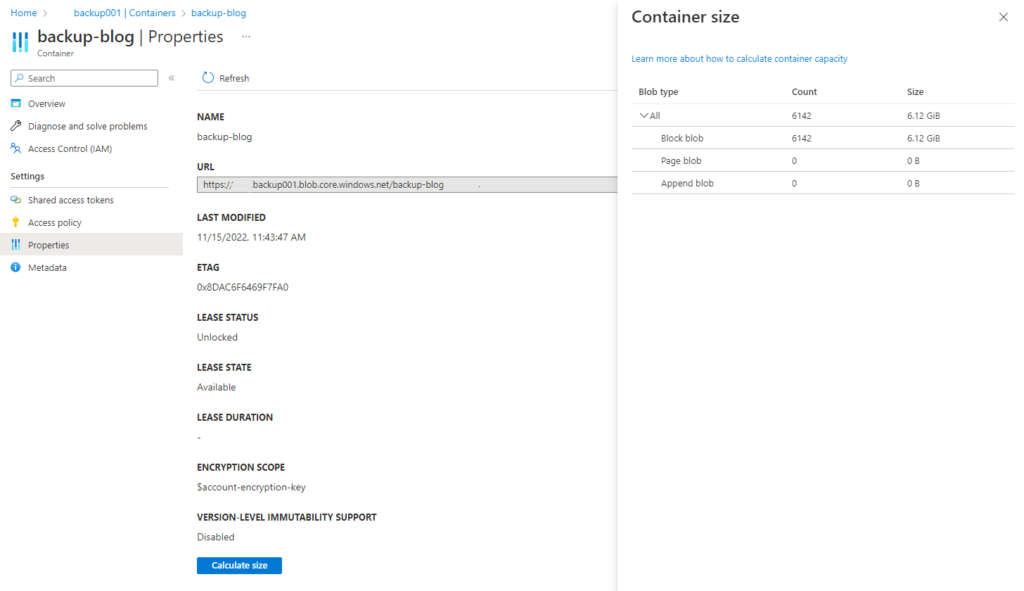
From your Azure portal, you have visibility into the storage consumption of your DD backup files in Azure Blob:
An important point to keep in mind about DD Cloud Unit, the backup traffic flow always goes through your DD appliance. You cannot backup directly from your backup server to your cloud unit. This also true to restore your data, you need to recall your data from the Cloud Unit to the DD appliance.
To conclude, my final recommendation for AVS (Azure VMware Solution) backup with Dell DDVE Cloud Tier is to keep your backup close to your runtime environment to avoid data transfer costs between Azure and your on-premise.
*Workaround for Azure Private Endpoint
As mentioned earlier, DD Cloud Unit only accepts Azure Public Endpoint. You can simply work around this limitation by tweaking your DNS and creating an alias for the default public Azure Blob storage domain (blob.core.windows.net) redirected to your Azure Private Endpoint (privatelink.blob.core.windows.net)
